If you’re into crypto swing trading, there’s one concept you can’t afford to ignore: support and resistance. These levels are like invisible walls and floors that guide price movement — places where the market often pauses, reverses, or explodes through.
Understanding how to use support and resistance in crypto swing trading gives you a massive edge. It helps you spot when to enter, when to bail out, and how to correctly manage risk.
Let’s unfold and explain in plain English how to actually apply support and resistance.
What Are Support and Resistance?
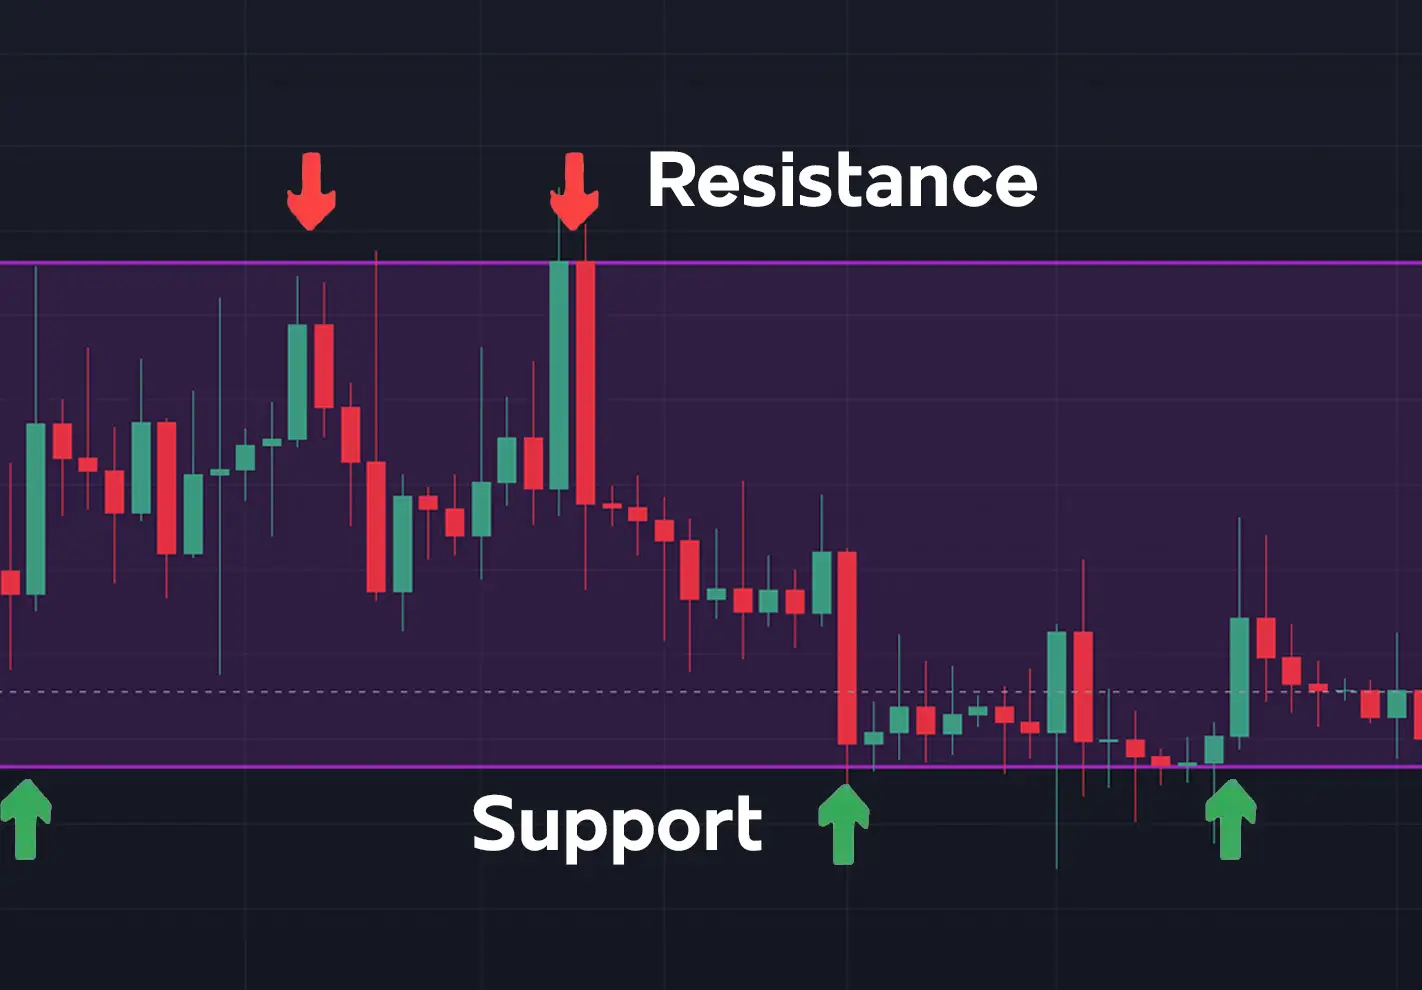
Think of support as a floor – a price level where buyers consistently step in to stop the price from dropping further. It’s where “smart money” tends to accumulate positions, creating buying pressure.
Resistance, on the other hand, is the ceiling – the level where sellers pile in, pushing the price back down. It’s where the market says, “enough’s enough.”
These levels aren’t random. They’re formed by human behavior – the emotional push and pull between buyers and sellers. When price repeatedly reverses at the same level, it tells you that traders are reacting to that zone.
In practice:
- Support = a previous low or trough where price bounced up.
- Resistance = a previous high or peak where price turned down.
You’ll spot them easily by looking at past price action and drawing horizontal lines at those key turning points. Those are your battlegrounds.

How to Use Support and Resistance in Swing Trading
Swing trading is all about catching those medium-term price swings, not scalp trades that last minutes, and not long-term holds that drag on for months. You’re aiming to ride the wave between support and resistance levels. Here’s how to use them effectively.
1. Identifying Key Levels
Start simple:
- Open your crypto chart (BTC, ETH, or your altcoin of choice).
- Zoom out to the 4-hour or daily timeframe.
- Mark significant highs and lows where price reversed direction multiple times.
Those zones are your key support and resistance levels. They tell you where the market has memory, where traders have previously taken action.
Don’t overdraw. Two or three major levels are often enough. You’re mapping out structure, not painting a spiderweb.
2. The Bounce Strategy
This one’s a classic. You’re looking for price to bounce off a key level — confirmation that the market respects it.
For example:
- Price drops to a major support zone and starts to rebound.
- You buy once a bullish candle confirms the bounce (e.g., a hammer or engulfing pattern).
- Your stop loss goes just below the support line.
- Your take profit targets the next resistance zone.
This approach works because you’re entering near the edge of the range, where risk is lowest and reward potential is high.
Pro tip: always wait for confirmation. Never assume a level will hold just because it did before. Let the market show its hand.
3. The Break and Retest Strategy
Markets don’t just bounce; sometimes they break. When a key level gives way, momentum traders rush in.
Here’s the setup:
- Price breaks above resistance (a bullish breakout).
- Wait for price to pull back and retest that same level: it should now act as support.
- Enter the trade when price starts moving back in the breakout direction.
- Stop loss goes just below the retested level.
This “break and retest” approach filters out false breakouts: those nasty head fakes that trap impatient traders.
It’s especially powerful in crypto, where volatility can exaggerate both the breakout and the pullback.
4. Risk Management Using Support and Resistance
Support and resistance aren’t just for entries: they’re also perfect for risk management.
You can use them to:
- Set stop losses just below support (for long trades) or above resistance (for shorts).
- Set take profits near the opposite level to lock in gains.
This helps you quantify your risk/reward ratio before entering any trade. For instance, risking $100 to make $300 (a 1:3 ratio) keeps you profitable even if you lose more than you win.
Swing trading without risk management is like sailing without a rudder: you might move, but you’re not in control.
5. Confirm with Other Indicators
While support and resistance form the foundation, confirmation indicators keep you from jumping the gun.
Useful ones include:
- Volume – A bounce or breakout backed by strong volume is more reliable.
- RSI (Relative Strength Index) – Shows overbought or oversold conditions.
- Moving Averages – Help confirm trend direction and dynamic support/resistance zones.
If all three align – price respecting support, RSI oversold, volume spiking, that’s your green light.
Swing Trading-Specific Tips for Crypto Traders
The crypto market moves fast and often fakes out traders. Here are a few swing trading tactics to sharpen your edge:
1. Trade the Range Until It Breaks
When the price is ranging, buy near support and sell near resistance. That’s your bread and butter as a swing trader.
When the range eventually breaks, switch strategies and trade the breakout instead. Simple, but effective.
2. Wait for Strong Confirmation
Patience pays. Don’t enter just because price touches a level. Wait for a clear reaction: bullish engulfing candles, wicks showing rejection, or volume spikes confirming buyers or sellers stepping in.
Crypto loves to fake out the impatient.
3. Use Multiple Time Frames
Support and resistance on higher time frames (like daily or weekly) carry more weight than those on shorter charts.
Use a multi-timeframe approach:
- Identify key zones on the daily chart.
- Refine entries on the 4-hour or 1-hour chart.
This helps you avoid trading noise and focus on significant market structure.
4. Stay Disciplined and Patient
Even the best setups fail sometimes. The goal isn’t to win every trade — it’s to trade well over time.
Stick to your plan:
- Enter only at your predefined levels.
- Manage risk.
- Avoid revenge trading after losses.
- Crypto rewards the disciplined and punishes the impulsive.
Common Mistakes When Trading Support and Resistance
Let’s be real: everyone slips up at first. Here are some classic traps to avoid:
Forcing levels where none exist.
Only mark zones with clear, repeated reactions. Random lines = random results.
Ignoring market context.
Support/resistance behaves differently in uptrends vs. downtrends. Always consider trend direction.
Setting stops too tight.
Give your trade breathing room. Crypto is volatile — respect the noise.
Chasing breakouts without confirmation.
Always wait for the retest or volume confirmation before jumping in.
Bringing It All Together
Using support and resistance in crypto swing trading isn’t about drawing perfect lines. It’s about understanding how price reacts around those zones: where traders hesitate, where they commit, and where momentum shifts.
Here’s the full swing-trading flow:
- Identify major support and resistance levels.
- Wait for bounces or breakouts.
- Confirm with indicators and volume.
- Manage risk using those same levels.
- Stay patient and consistent.
If you master these basics, you won’t be guessing but actually reading the market’s language.
Final Thoughts
Support and resistance are the backbone of crypto swing trading. They give structure to chaos and let you make decisions based on logic, not emotion.
Combine them with solid risk management, confirmation tools, and patience, and you’ll start trading like someone who’s in control, not someone the market controls.
Remember, charts don’t lie, but traders often lie to themselves. Let the levels guide you, and the swings will follow.